


婚活サイトをオススメする理由

いったい何の数字だと思いますか?
これは最新の調査で明らかになった20代後半男性の「未婚率」です。

令和2年度版 内閣府公表の「少子化社会対策白書」より
世間では「晩婚化」などと騒がれていますが、まさかの「7割超」に衝撃が走りました。
さらにこの調査では、
- 女性の未婚率も61.3%
- 生涯未婚率は「23%」と30年前の10倍
- 年間の婚姻件数も約半分に
という壊滅的な結果が明るみになりました。

では、世の中の人は結婚そのものを望んでいないのでしょうか?
「そんなことはありません。」
生涯を誓うパートナーと出会い、幸せな家庭を築くことは誰もが求める理想なのです。
これだけ便利になった世の中なのに「結婚できない理由」を聞くと大抵の人が「イイ出会いがない」と口を揃えます。

そんな中で昨今注目を浴びているのが「婚活サイト」の存在です。
「婚活はしたいけど時間がない」「婚活パーティーはちょっと気が引ける」という男女共通のニーズとスマホ普及でネット環境が充実した事がマッチングし、爆発的に利用者数を増やしているのです。

ちょっと奥手な方や多忙なビジネスマンも恋愛が身近な存在になり、どんどんチャンスが広がります。
当サイトでは人気沸騰中の「婚活サイト」を徹底的に比較し、年齢層・会費などカテゴリ別に特徴をご紹介していきます。
紹介サービスの選定基準
無数にある婚活サイトの中から会員数・運営実績・料金をベースに特にお奨めできるサービスをピックアップしました。
それぞれ年齢層の違いや独自の婚活サポート機能など魅力的な特徴があるので、じっくり検討してみてください。
当サイトでは紹介サービスの"信頼性を担保"するため、全てに登録し「結婚真剣度」「健全性」を確認すると共に運営各社へ訪問取材を実施しています。

取材は3時間に及ぶ長時間になることもありますが、自社サービスに掛ける"熱い想い"や"ネット婚活を盛り上げていくんだ!"という強い志を肌で感じることができます。
婚活サイト15選を一覧比較
婚活サイトの比較一覧表です。スマートフォンにて閲覧時は⇒方向にスライドして御覧ください。

〜 4,300円
(ミクシィの子会社)
女性 20〜40歳
婚活に定評がある

〜 3,400円
女性無料
(MSPJ加盟企業)
女性 25〜40歳
優遇措置あり

〜 4,490円
(米国本社:Match.com, L.L.C.(ナスダック上場))
女性 20〜35歳
出会える保証あり!

〜 10,000円
(回)
女性 20~60歳

〜 4,378円
女性 25〜40歳

※2022年3月時点
〜 3,900円
女性無料
(資本金395,442千円)
女性 18〜40歳

〜 3,700円
女性無料
(MSPJ加盟企業)
女性 18〜35歳
気軽に始められる!

〜 3,980円
(東証一部上場)
女性 25〜40歳

〜 4,277円
女性無料
女性 25〜40歳
カップル20万組の実績

※2022年1月時点
〜 3,600円
女性無料
女性 20〜35歳

〜 3,980円
※初月無料
女性 25〜40歳
本格婚活サービス

月会費:13,000円
(エンジャパンの子会社)
女性 25〜40歳

〜 3,980円
女性無料
女性 25〜40歳

〜 2,980円
女性無料
女性 30~45歳

〜 3,700円
女性無料
女性 18~35歳
これだけの種類があるとどの婚活サイトを選んでいいかわからない…
当サイトでは、そんな方に活用していただきたい「婚活サイト診断テスト」をご用意しました。
性別・年齢といった基礎情報と「直ぐに結婚orじっくり恋愛して」など結婚に対する"価値観"を4つの質問で解析します。
テストは2択の質問に答えるだけのシンプル仕様で、30秒程で答えが分かります!


昨今急激に会員数を伸ばしているファイスブック連動のオススメ婚活サービスを特集しました。
ネットコンテンツの中で最も個人情報の信ぴょう性の高いとされるSNSと連携することで、見知らぬ相手をより身近に感じることができるのが特徴です。
Facebook友達にバレない?と不安に思うかもしれませんが、名前はイニシャル表記。友達関係の人にはお互い非表示になる。一切投稿はされない。などの徹底したプライバシー保護がされているので安心してご利用いただけます。
Facebook連携系特集はこちら

いくらネットが発達しても、雰囲気やフィーリングまで伝達することはできません。
会った瞬間にビビっとくるあの感覚を味わえるのはパーティーならではの醍醐味ですね。
もちろん普段はネット婚活をしながら、月に数回パーティーに参加する。という方も多いですよ!
おすすめ婚活パーティー特集

数ある婚活サイトを選ぶにあたって会員数や会費は一つの基準ですね!
出会いの可能性を最大限に広げるには絶対的に会員数が多いサービスを選ぶべきですが、重要なのは表面上の数だけでなく「アクティブ会員」の割合です。当サイトでは活動的なユーザー数を考慮した3サービスをピックアップしました。
会員数で選ぶ
婚活サイトは月額制を採用しているサービスがほとんどですが、その金額は2,000円台のところから4,000円近いものもあります。
各社、1ヶ月よりは半年、1年会員の方が1月当たりの会費がお得になるようプランが設定されていますが、当サイトでは「1ヶ月単位」での会費をもとに比較を行いました。
お手頃会費で選ぶ
婚活サイトでは多くの個人情報を開示することになりますし、サイトセキュリティーがしっかりしていることも重要なポイントです。
最後は、運営会社の規模や運営歴などからより信頼性の高いサービスをピックアップしました!
運営会社で選ぶ出会うまでのステップ
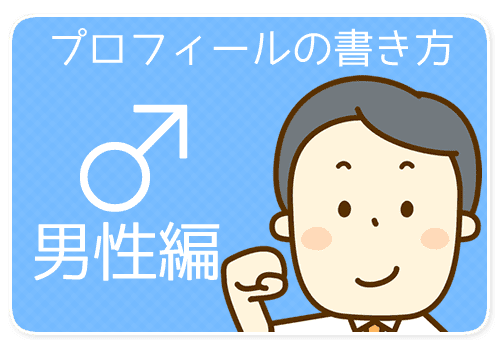
STEP1プロフィール作成

お気に入りのサイトに登録したら、まず始めに行うのがプロフィール作りです。
職業や年齢、住んでいるところなどがキチンと書かれていることはもちろんですが、性格や好きな事(趣味)、休日の過ごし方などあなたの内面的な魅力が伝わるプロフィールが好印象を与えます。

STEP2異性にコンタクト

さぁ、いよいよコミュニケーションの始まりです。
基本は気になる異性へメッセージを送るなどアプローチして、お互いの気持ちがマッチングすればやり取りがスタートするという仕組みです。
「いいね!」を押したり「足跡」をつける、など各サービスごとにさまざまなアプローチの方法がありますよ。
ファーストコンタクトのポイントSTEP3メッセージのやりとり

あまり意識しすぎず、異性の友達とメールやLINEをしている感覚で楽しく会話しましょう。
男女共通で盛り上がれる話題としては趣味の話や最近行った旅行先、話題の映画・音楽の話などが多いようです。
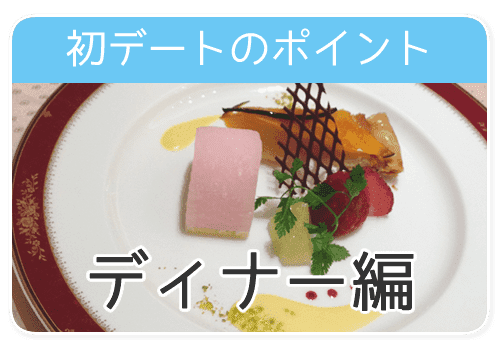
STEP4デートに誘う

ついに初対面の時がやってきました。
そして婚活サイトの役目もここまでです。
ここからは普通の恋愛と同じで食事やデートを重ねて二人の距離を縮めていきましょう。
久々のデートだと「どんな服を着ていこう」「何を話したらいいのだろう」「どこに連れていったらいいの」と困ってしまうかもしれません。
そんなときは次の記事も参考にしてみてくださいね。

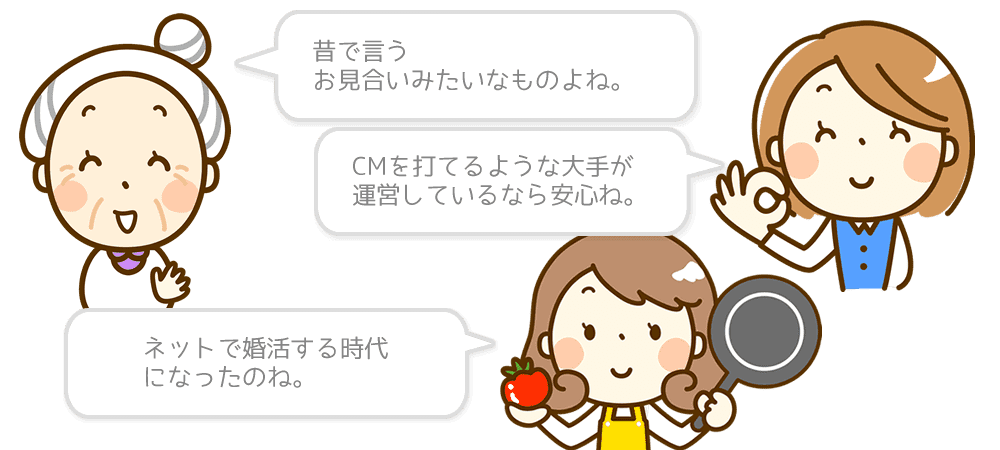
婚活はネットの時代に?!
「なぜ今更婚活サイト?」と思われるかもしれません。
実は婚活サイトは昔から存在しており一定の需要はありましたが、結婚相談所のサービスの一部であったり、会員数が少ない・料金が高い・匿名性が高すぎて不安などが足かせとなり非常に限られた市場でした。

そんな背景から婚活サイトはあまり表にでることはなく、世間的にも"ちょっと怪しい"というレッテルを貼られてしまったのです。
しかし、ここ1.2年で急激に婚活サイトが注目され始めました!
その要因は様々ですが、理由は大きく3つあります。
会員の質がグッと上がった
大手企業(イオン・楽天など)の参入により、会員数数十万人というビッグ媒体が複数登場したことにより、各社の競争が激化。
結果的にユーザーは選択肢が広がり、不良サイトは淘汰され「優良サイト」のみが生き残っているという縮図が完成したのです。
運営側も会員の精査には抜かりがなく「身分証提示」や「身元照会」を徹底しているサイトも珍しくありません。
真剣に出会いを求めている側からすればこういった徹底は安心感にもつながりますね。
また、任意で「独身証明書」や「年収証明」などを提示できるサービスもあり、これらも女性に対して好印象を与えることができます。

インターネット・スマホの普及
インターネット環境、特にスマートフォンの普及はネット婚活を一気に加速させました。
PC・ガラケー時代から婚活サイトはありましたが、利便性や画面の小ささ・読み込みなどのストレスから快適とは言いにくいサービスでした。
それが短期間の間にスマホが主流となり、移動時間や昼休みなどちょっとした空き時間にもPCと遜色のないレベルでサービスを利用できるようになりました。
さらに、アプリによる利用ができることで登録自体のハードルも下がり人気を後押ししています。

世間的なイメージが改善された
そしてなんといっても世間的な印象がガラっと変わったことがあげられるでしょう。
一昔前なら「ネットがきっかけで出会った」というだけで「不純」「非常識」「怪しい」というネガティブイメージしかありませんでした。
しかし、今はどうでしょう?
SNSやtwitterをきっかけにした恋愛ドラマや映画が放映されたり、婚活サイト自体もよりSNS風にリメイクされ様々なイメージUP広告を打つことで、世論的にも1つの婚活手段として幅広い年齢層に認知されてきています。

さらに加速していく婚活サイト
右肩上がりの婚活サイトですが、今後さらにその市場や認知度が拡大していきます。
記憶に新しい出来事で、2014年6月にその起爆剤の一つとなる大きな報道がありました。
- 「民放連は結婚情報サービス業のCMを放映できるよう自主規制解禁を検討」
結婚相談所や調査業・探偵業などは民放連の自主規制によりCMを打つことはできませんでした。
しかし、ネット広告に押され新たな広告主を模索していた放送業界は規制緩和により起死回生を狙ったのです。
その後、ツヴァイなど有名どころの婚活サービスが次々とCMを初め、今日も目にする機会が増えました。
これにより莫大な資本力を持つ大手婚活サイトは市場拡大とイメージアップ戦略のためにTVCMをフル活用し「ネット婚活」そのものを社会的に認知させるのです。
実はこのようなCMに纏わる社会現象は今に始まったものではありません。
1993年には金融業のCM規制緩和でプロミス・アイフルなどの消費者金融がこぞってCM戦略を展開し、見事それまでのグレーなイメージを払拭し市場拡大に成功しました。
2009年のパチンコCM解禁では、落ち目だったパチンコ業界をV字回復させました。
 ちょっと豆知識・婚活サイトの歴史
婚活サイトは
「きっかけ」に過ぎません
婚活サイトの素晴らしさを紹介してきましたが、ハッキリ言えば知り合うための手段に過ぎません。
「職場や学校が一緒だった」「友人の紹介」「合コンやイベント」などと同じで、たまたまそのきっかけが婚活サイトだった。というだけのことなのです。
逆に言えば、初めて会ったその瞬間からごく一般的な恋愛となんら変わりはなく、お互いに惹かれ合えば食事や映画などのデートを重ね、恋人となり、結婚へと歩んで行くのです。


大切なのは「出会い方」ではなく「生涯愛し続け、寄り添えるパートナー」を見つけることなのです。
婚活サイトのよくある質問
ネット婚活の素晴らしさはわかったけどまだ不安が…という方もいると思います。
当サイト運営を通じて、体験談をインタビューした方や投稿・問い合わせで頂く"よくある質問"をまとめていますので、是非参考にしてみてください。
これから始める方だけでなく、すでに婚活サイトで活動をしている方からいただく「返信がこなくなってしまった。」「何通目でデートの打診をすればいいの?」などの疑問にも具体的なアドバイスで回答しています。
現状、婚活に行き詰まってしまっている方なら、打開策になるようなヒントが隠されているかもしれません。


もちろん自信を持ってオススメできる大手優良サイトのみを掲載していますのでご安心ください!